Two weeks ago, I decided I needed to practice our Better Homes and Gardens cook-off recipe one more time before the big day, so we did a test run of burgers and s’mores (which were not part of the cook-off, but it was the first time in 6 months we could light a fire without immediately wanting to die). My friend Jeni brought fries and with them, she brought what was hands-down one of the best dipping sauces I’ve ever had. Ever. Like…one of those dips where you check to see if anyone’s looking and then nonchalantly dip your finger in it and then proceed to lick it off. Yes, I totally just admitted to that.
About a year-and-a-half ago, we posted a recipe for crispy diner-style fries along with fry sauce, a species that seems to be indigenous to Utah/Southern Idaho. Being a born-and-bred Utah girl, of course I love my fry sauce. But this is the next step up–something you don’t have to apologize for or explain to people who may not be familiar with the pink stuff. This is full-blown grown-up fry sauce. And I can’t think of anything savory that it wouldn’t be good on. In addition to the diner-style fries, you could try it on…
–Oven Steak Fries
–Sweet Potato Fries (the honey-lime dip is awesome, but just in case you feel the urge to mix it up)
–Crispy Coconut Chicken Fingers
–Baked Fish Sticks
–Crispy Shoestring Onions. Please don’t even get me started on this…save your pennies on the Bloomin‘ Onion/Awesome Blossom {extra awesome} /Onion Brick (which, incidentally, gets the award for the worst appetizer name in restaurant history).
–Spread it on buns before adding grilled burgers or chicken breasts
–Use it as a sandwich spread, especially hot turkey, roast beef, or corned beef sandwiches
–Omit the ketchup and use lemon juice instead of lime juice for a crab cake remoulade
The ingredients are inexpensive and probably stuff you either already have or that are super easy to find: Ketchup, mayonnaise (NOT Miracle Whip), capers, garlic, red onion, fresh lime juice, cayenne pepper, and Creole mustard. Don’t worry, you can find Creole mustard at most major American grocery stores (Zatarain’s is widely accessible and inexpensive). It is really uniquely flavorful and so good; if you’re looking for a great ground mustard, this is one of the best options.
If you are wondering (or ever have, or will now that I’m bringing it up) what capers are, they’re little buds from the caper bush, which grows in the Mediterranean. The buds are plucked off the bush before they can bloom and then they are pickled.
They’re salty and mild and add a similar flavor to dill pickles, only a little more subtle and complex (hence the grown-up dipping sauce).
Anyway, combine all the ingredients in your blender or in the small bowl of your food processor (if you have one) and blend until the desired consistency is reached. If you’re worried about heat, start with a little less than a quarter teaspoon of cayenne pepper and then, after you’ve mixed everything together, add a little more until the sauce is as spicy as you’d like it.
After you’ve mixed your sauce, store it in the refrigerator for at least an hour and up to a week. Serve it on whatever you want and prepare yourself for a little subtle finger-licking…
Grown-Up Dipping Sauce
Recipe on Our Best Bites, adapted from Cooking Light by Jeni Mangum
1/4 c. mayonnaise (not Miracle Whip; light mayo is fine)
1/4 c. ketchup
1 1/2 Tbsp. capers, drained
1 1/2 tsp. minced garlic
1 1/2 tsp. minced red onion
1 tsp. fresh lime juice
2 tsp. Creole mustard (Zatarain’s is widely available at most major grocery stores)
1/4 tsp. cayenne pepper
1/8 tsp. kosher salt
Combine ingredients in blender or the small bowl of a food processor. Blend until smooth. Refrigerate for at least 1 hour before serving.
For a crab cake remoulade, omit the ketchup and replace the lime juice with lemon juice.
In the past few weeks, we’ve gone from winter to summer in Louisiana with spring barely making an appearance. Or maybe it did, but I was so busy with book and blog stuff that I missed it. Either way, I’m a little bummed and it’s hot outside. And if you were reading our blog last summer, you know how much I love summer in Louisiana. Let’s just say that I’m already looking into ways we can get away this summer so I don’t harm myself and those around me.
After coming out to the realization that I’m not nearly as stressed as I was two weeks ago (as well as the fact that I totally blinked and missed spring), I took a look at my yard and was horrified. Leaves, acorns, overgrown who-knows-what, grass that needed to be mowed, all covered with a generous dusting of pollen. So we spent the weekend cleaning up the yard, ripping out dead bushes, finding good homes for a whole bunch of roses that I refuse to take care of in the manner to which they’re accustomed, and shopping for plants. I was even brave enough to buy some veggies and herb plants and a garden and I are having a trial run this summer. My husband has very low expectations of success (not without reason).
When we spend so much time outside in the heat, I never really want to eat much, and I definitely want something light and fresh. In a few days, I’m posting a yummy little salad that my sister-in-law Stephanie made a long time ago when we were both newlyweds. I couldn’t remember the salad dressing recipe, but I remembered what it was like, so I did a little experimenting. I love, love, love how light and fresh this dressing is–it totally brightens everything on the plate and is perfect for a spring or summer salad.
You’ll need about two lemons, rice wine vinegar, sugar, canola oil, a little bit of onion, a clove of garlic, some salt and pepper, and some poppy seeds.
Now…when we did our cooking demonstrations at Orson Gygi last week for the book launch, in both classes, we were asked what our favorite kitchen tools were. We pretty much agreed on everything and 100% believe that the Microplane is a totally essential item in your kitchen arsenal. Mine got a lot of love in this recipe.
Using a Microplane, grate the zest off both lemons and then grate 1 tsp. onion. Place the lemon zest and onion in a container with a lid (I just used a Tupperware container). In the same container, add the sugar, salt, pepper, oil, vinegar, poppy seeds, pressed garlic, and about 1/3 c. lemon juice (more or less–if you’re almost there or a little over, don’t toss it or juice another lemon). Close the lid and shake vigorously. This is best if it can stand for at least an hour before you serve it–just pop it into the refrigerator and then shake well before serving.
I could eat just this dressing on plain spinach all the time and totally not feel bad about myself. But the salad I’m posting later this week is even better, so stay tuned!
Lemon Poppy Seed Vinaigrette Recipe by Our Best Bites, inspired by Kate’s sister-in-law Stephanie
2-3 large lemons (use as needed–you’ll need 1/3 c. juice and 1 tsp. zest)
1/4 c. rice wine vinegar
1/4 c. canola oil
3/4 tsp. kosher salt
1/4 tsp. freshly ground black pepper
1/4 c. sugar
2 tsp. poppy seeds
1 tsp. grated onion
1 clove finely pressed garlic
Using a Microplane or other fine grater, grate 1 tsp. lemon rind off the lemons. Grate 1 tsp. onion. Place in a small container with a lid. Add the remaining ingredients and shake vigorously. If possible, refrigerate at least an hour before serving. Shake well before serving.
When I was a kid, we always, always, always used Miracle Whip for everything–mayonnaise was something like Crest toothpaste or Pepsi that I had some vague notion of, but we were a strict, by-the-book Miracle Whip, Colgate, Coca-Cola family and I just figured mayonnaise and Miracle Whip were two different names for the same thing.
Well, one day when I was about 12, I was making a recipe that called for mayonnaise and we were out of Miracle Whip. I ran down to our neighbors’ house to borrow some some mayonnaise and it was like a light bulb went on, like the heavens opened, like a revelation. A salad dressing revelation. If I had to mark a moment when I realized that there were culinary worlds beyond what I grew up eating, that was it (and it happened with mayonnaise).
I’ve wanted to make homemade mayonnaise for a long time, but I am terrified of raw eggs (not in a The Ring kind of way, which made me sleep with the lights on for two weeks when I was 22), but salmonella has always just freaked me out. I’ve always wanted to try pasteurized eggs, but we’ve never lived in a place where they’re sold. I finally got a chance to try them (I tried Safest Choice) and I literally whipped up my own mayo in about 3 minutes. It was awesome.
I totally, totally know that not everyone has access to pasteurized eggs, so go check out this very thoughtful and thorough tutorial on Baking Bites. She makes a lot of well-reasoned arguments regarding this method of making raw and undercooked eggs safe and once I’m out of pasteurized eggs, I’m definitely going to try it.
For the homemade mayonnaise, you’ll need an egg yolk (check out this tutorial to see how to separate eggs), a little of your favorite mustard (unless it’s yellow mustard…if that’s the case, I recommend finding a new favorite mustard!), olive oil, canola oil, and some lemon juice. That’s going to form the mayonnaise base, and then I’m going to throw in some garlic and rosemary at the end for an unbelievable sandwich spread.
Place the egg yolk, mustard, and lemon juice in a medium bowl
and whisk until just combined. Combine the oils and arm yourself with a whisk (I actually tried this with a blender, and immersion blender, and by hand, just for the heck of it, and I actually think that aside from the semi-strenuous arm workout, by hand is the easiest and least messy). Whisk the egg yolk mixture and add a few drips of the oil mixture until combined, whisking vigorously the whole time. Add a few more drips, whisking until combined. Repeat, adding a little more oil each time. As it starts to thicken and come together, you can add the oil in a slow, steady stream, whisking vigorously the whole time. After you’ve added all the oil, continue whisking for about 30-60 more seconds or until the mayonnaise is thickened. It won’t be as thick as commercial mayonnaise yet because a) it will continue to thicken with time and b) it’s a little warmer than room temperature.
Whisk in the salt and pepper and then add a little more seasoning to taste. This is your mayonnaise base and you can refrigerate it at this point and use it. However, I recommend whisking in 2 small cloves of pressed garlic (about 1 1/2 teaspoons) and 1 teaspoon of chopped rosemary. Let it hang out for about an hour in the fridge and then you have seriously one of the most incredible sandwich spreads ever.
Homemade Garlic-Rosemary Mayonnaise Recipe adapted by Our Best Bites from Cooking Light
1 egg yolk (see tutorial here)
2 tsp. freshly squeezed lemon juice
1 tsp. coarse-ground or Dijon mustard
1/4 heaping tsp. kosher salt
1/8 tsp. freshly ground black pepper
1/2 c. canola oil (make sure it’s fresh–if it has any hint of being rancid, use a different bottle because it really impacts the flavor of your mayonnaise)
1/4 c. olive oil
2 small cloves garlic, pressed
1 tsp. chopped fresh rosemary
In a medium bowl, whisk together the egg yolk, lemon juice, and mustard. Combine the oils in a separate container and, while whisking the egg yolk mixture vigorously, add a few drips of the oil mixture. When the mixture is completely combined, add a little more oil, repeating with larger amounts of oil each time until you’re adding it in a steady stream. After all the oil has been added, continue whisking vigorously for 30-60 seconds or until the mixture is thickened. It won’t be as thick as commercial mayonnaise because it will continue to set and because it’s slightly warmer than room temperature.
Add the pressed garlic, chopped rosemary, and additional salt and pepper to taste. Refrigerate for at least an hour before serving. This will keep for about 3-5 days.
One of the reasons I used to be scared of canning is that I assumed it was a requirement to have four hundred pounds of something or other and 10-12 hours of kitchen-trashing labor which resulted in 207 jars to put away in closet space I didn’t have. I couldn’t think of anything I needed 207 jars of (unless there’s a recipe for canned dark chocolate out there). Honestly, I have yet to can anything large scale yet, but what I’ve found is that it doesn’t have to be a huge project. There are plenty of recipes scaled down to just a few jars and if the actual recipe itself is fairly quick and easy to prepare, it’s a very doable and worthwhile project. (On the other hand, if the recipe really does take half a day, every dish in your kitchen, and your sanity, you’re going to want to make sure it results in 207 jars.) This happens to be one of those quick and easy ones so it’s perfect for beginners! If you’re not interested in canning, don’t tune out just yet! Because this recipe is so small, you can certainly still make it and just keep it in the fridge.
I saw this recipe for Peach BBQ Sauce and I could tell by the ingredient list that I would love it. Plus it seemed perfect seeing that peaches are all over the place right now. It’s actually nothing like a traditional BBQ sauce, as you can probably tell by the pictures, so keep that in mind. I don’t want the name to be misleading. The consistency and flavor is more like a chutney or even a sweet and sour sauce. If you’re like me and love a sweet and savory combo (with a little kick) they you’ll love this. I think it would be really good on a turkey burger, a pulled pork sandwich, ribs, and definitely spooned over grilled chicken or fish. I can’t wait to use it as a dipping sauce for our Crispy Coconut Chicken- I think the flavor profile is perfect. Scroll to the end of this post to see how we ate it at our house; my hubby and I loved it.
Also, I was excited to see this recipe scaled way down to just 3-4 little half pint jars. To you crazy canners out there, that’s probably even humorous, but it’s perfect for beginners and people like me who are in the mood to try something new before embarking on an all-day canning adventure. For the mini batch you just need a few peaches, a red pepper, an onion and some garlic.
Also, Worcestershire sauce, red pepper flakes, dry mustard, salt, honey, and apple cider vinegar.
The recipe calls for “finely chopped” everything. I figured everything would break down after simmering, but it didn’t break down as much as I thought, so definitely chop things up small unless you want a really chunky sauce.
In fact, I would definitely recommend pressing your garlic through a garlic press. I just chopped mine and it wasn’t as soft as I wanted it in the finished product. If you make a large batch (or even with this small batch) it might be helpful to pop things into a food processor as well- not to puree, but just to chop finely.
At this point you’re just going to add everything to your pot. I love the colors going on in here.
One of the main reasons I knew I would like this: honey. Mmm…
In goes the apple cider vinegar, red pepper flakes (this does have a nice little kick to it; not too spicy, but enough to notice) ground mustard and Worcestershire sauce.
You just need to bring it to a simmer and let it work for about 30 minutes. Everything will break down and you can gently smash things up with the back of a spoon if you need to. I even stuck a potato masher in there at the end to get the consistency I wanted.
You can see in the photos how it goes from looking like a salsa to a darker colored, thicker sauce.
While your sauce is simmering, fill up your waterbath cannerwith water. Since I’m making such a small batch, I just used a normal sized stock pot. Your jars should be clean and warm when you fill them; I usually put mine through my dishwasher and have them heat dry. Use a funnelto fill up your jars and make sure to leave 1/2 inch headspace on the top. I have a little tool to measure it with, but you certainly don’t need that.
You should also heat up a small pot of water with your lids in it while your sauce is simmering. Bring it to a simmer and leave lids in the pot until you’re ready to use them. After your jars are filled up with your sauce, wipe the rim to ensure it’s clean and dry. Use the magnet tool (check out this little kit) to pick up a lid and place it on your jar. Screw the band on- not crazy tight, just normal snug.
If you’re a newbie and feel like trying out canning but not sure if you want to invest in all of the equipment, or even can a large amount of stuff, I highly recommend this mini set (called the “Home Canning Discovery Kit” by Ball. It’s only about 10 bucks. It comes with 3 jars, a little recipe booklet, and this small green piece you see in my photos that just fits into a normal sized stock pot. It only fits about 4 jars at a time, but if you’re just starting out and want to experiment on a smaller scale, it’s perfect. I love it for when I want to try a new recipe so I make a small batch. Back to the recipe…just lower your jars into the simmering water and process for for about 15 minutes. If you live at a higher altitude you’ll need to process them for a bit longer and those times are noted in the recipe.
After they come out the jars need to sit at room temp. Don’t be tempted to fool around with them, just leave them alone! I had enough sauce to can 3 full jars with a little left over. My family really loved it- we thought it pretty good as it was going into jars, but it was way better after it had cooled and thickened a bit and the flavors had a chance to marry a bit more. And while it was really great on a spoon, it was fantastic with grilled chicken.
With honey and cider vinegar being main flavor components, I instantly thought of our beloved Spicy Honey Chicken. So I grilled up some chicken thighs (without the glaze) that I rubbed in those spices. I skipped the chipotle powder in that recipe since the sauce already has some heat. I brushed some over the meat during the last few minutes of grilling, but I wish I would have saved it and put it all on top at the end. I had a fairly chunky sauce so I lost some of it to the grill! I served it with rice too, and one of my favorite things was eating the rice that had soaked up the extra sauce.
You can see in the pictures it’s almost like a thick salsa. It’s sweet and tangy and savory and so great when combined with the meat. Hope you guys enjoy it as much as we did; this is something that would make a great gift!
Spicy Peach BBQ Sauce Recipe from Ball *note this is a very small batch; I only canned 3 half pint jars with it. Click on the link above to see measurements for a larger batch as well.
Ingredients:
3 cups finely chopped pitted, peeled peaches (abt 1 1/2 lbs or 5 med)
1/2 cup finely chopped seeded red bell pepper (abt 1/2 large pepper)
1/2 cup finely chopped onion (about 1/2 large)
1 1/2 Tbs finely chopped garlic (about 7 cloves)
2/3 cups honey
1/3 cup cider vinegar
1 1/2 tsp Worcestershire sauce
1 tsp hot pepper flakes
1 tsp dry mustard
1 tsp salt
4 (8 oz) half pint glass preserving jars with lids and bands
*If you’re new to canning, make sure to read our “Introduction to Home Canning and Preserving post, found by clicking here.
Directions:
1. Prepare boiling water canner (as in, fill up your big pot with water) . Heat jars and lids in simmering water until ready for use (I put my jars through the “sanitize” setting on my dishwasher and place the lids in a pot of simmering water). Do not boil. Set bands aside.
2. Combine all ingredients in a large saucepan. Bring to a boil. Reduce heat and simmer, stirring frequently, until mixture thickens to the consistency of a thin commercial barbeque sauce, about 25 minutes.
3. Ladle hot sauce into hot jars leaving 1/2 inch headspace. Remove air bubbles (just place the head space measuring device or a clean spatula in the jar and gently move back and forth a few times). Wipe rims. Center hot lid on jar. Apply band and adjust until fit is fingertip tight (that means don’t screw it on super duper tight, just normal snug.)
4. Process in boiling water for 15 minutes, adjusting for altitude*. Remove jars and cool. Check lids for seal after 24 hours. Lid should not flex up adn down when center is pressed.
*Recipe as written is for altitudes 0-1000 ft above sea level. Increase processing time for amount given for each altitude: For 1,001-3,000 ft: add 5 minutes. 3,001-6,000: add 10 minutes. 6,001-8,000: add 15 minutes. 8,001-10,000: add 20 minutes.
Serve over chicken, fish, or pork, or as a spread on turkey or chicken burgers or a dip for Crispy Coconut Chicken Fingers.
One of the most common questions we get is how to get picky eaters to eat. That is a great question. And pretty much one I don’t have the answer to. I have two picky eaters, and the really tricky thing is that they’re picky in different ways. My 7-year-old doesn’t like how certain foods like meat, most fruits, pretty much all potatoes, oatmeal and other hot cereals, any kind of dip or dressing, and jam (yes, jam) feel in his mouth. What will he eat? Cheese, bread, vegetables, cold cereal, macaroni and cheese, seafood (huh??) and chicken nuggets (because apparently those aren’t meat). Nutritionally speaking, he could probably be in worse shape.
My 4-year-old daughter has all sorts of sudden food likes and dislikes that are usually influenced by her BFF of the week (I’m way more concerned about that than I am about her picky eating). I can, however, convince her to eat just about anything if I serve it with ketchup or Ranch (which she refers to as “white ketchup.”)
I had really mean parents that made me get a job when I was 16 (don’t tell them that after all that whining, I’m really thankful for those experiences now). From the time I was 16 until I was 22 or so, pretty much every job I had was in the restaurant industry. And, with the exception of Summer from Hell in a grocery store bakery, all of those jobs involved Ranch dressing in some form or another. At one particular Utah-based sandwich establishment that roasts their own turkeys and bakes their own artisan breads, customers felt strongly passionate about the Ranch dressing served there. I made it every morning for 2 years and it’s so unbelievably beyond easy. And before you say, “Hey, lame-o, post a real recipe!”, let me just tell you that yes, I’m just making a few tweaks to the instructions on the packet, but a) this isn’t a recipe, it’s more of a tip, b) those few tweaks end up making a HUGE difference, and c) this is always something I have to go back and look up to make sure I have the right proportions, so now I’ll always know where to find it.
You’ll need a packet of Hidden Valley Ranch dressing mix, buttermilk, mayonnaise (not Miracle Whip), and Greek yogurt.
You can use sour cream in place of Greek yogurt, but I’ve found fat-free Greek yogurt tastes much better than fat-free sour cream, and since I’m trying my darndest to not gain 82 pounds this pregnancy, I use the fat-free Greek yogurt. If you’re going to use sour cream, I definitely recommend either using full-fat or reduced-fat, but not fat-free.
Disregard the instructions on the packet. Place 1 cup of mayonnaise (or reduced-fat, but not fat-free mayo) in a bowl. Add 1/2 cup buttermilk and 1/2 cup plain Greek yogurt.
Add the contents of the dressing packet. In this particular case, I actually prefer the original Hidden Valley Ranch dressing (instead of the buttermilk), but alas, I grabbed the wrong packet out of the pantry. Also, if you have a hard time with packaged salad dressings, check out this recipe.
Whisk it together. That’s it. Use it as a salad dressing or a dip for veggies.
True story: during one of our many Ikea trips last year when we were remodeling our kitchen, I came across their little espresso cups and saucers. They were ADORABLE and irresistible and, in true Ikea fashion, so cheap that I couldn’t not buy a set, even if it was only one cup and saucer and even if I don’t drink coffee. And then I came home and back to my senses and wondered what the heck I was going to do with a teeny tiny cup and saucer. My answer?
That’s right. Perfect little portions of veggies and dip. This is seriously the only way I can get my daughter to eat broccoli–she pretends it’s a tea party. Wouldn’t these cups and saucers be perfect way to serve veggies at a baby or bridal shower? Tiny things make everything more delicious…
Restaurant-Style Ranch Dressing Recipe from Our Best Bites, inspired by Kneaders Bakery
1 cup mayonnaise or light mayonnaise (not Miracle Whip)
1/2 cup Greek yogurt or sour cream
1/2 cup buttermilk
1 packet Hidden Valley Ranch dressing mix
Instructions:
Whisk ingredients together. Serve as a salad dressing or dip for vegetables. Refrigerate any leftovers.
Disclosure: This post was sponsored by Hidden Valley Ranch. As always, our opinions, ideas, and thoughts are completely our own.
First off, we need to announce the winner of our food storage giveaway! The winner is #1025, Heather H. Congrats, Heather! Please email us ASAP to claim your prize!
Secondly, we’re going to pick a winner for the Photo Contest Giveaway tonight, so you still have time to enter!
And finally…Blueberry Sauce. Yeah, yeah, it’s kind of a summery thing, but for me, the most evil part of summer is starting to end and summer how I knew it growing up (hot days and cooler nights) is beginning. So while all of you were gallivanting around with your barbecues and your bonfires, I was huddled in a corner in the fetal position, wondering why my air conditioner wasn’t working properly. And now I am barbecuing and bonfiring (yeah, spell-check, I know that’s not a word…your squiggly red lines don’t intimidate me…) And eating blueberry syrup. On my waffles (come Friday) and my ice cream (every night between now and Friday).
This recipe is super easy. You’ll need 2 cups of blueberries (fresh or frozen), 1 cup of water, 2/3 cup sugar, 2 tablespoons corn starch, 1/4 cup strained lemon juice, and 1 teaspoon vanilla extract.
In a large, heavy saucepan, combine the water, sugar, lemon juice, and corn starch. Bring to a boil, stirring frequently, and boil for 1-2 minutes or until the mixture begins to thicken. Add the blueberries and stir constantly for 5 minutes. You can either mash or blend the berries or you can leave the berries whole. I think mashed berries work better for syrup and whole berries work better for ice cream (I like how they kind of freeze up on the ice cream, but I find them a wee bit creepy on pancakes or waffles or french toast).
This makes about 3 cups. And yes, before you ask, this can be frozen and I’m sure it can be canned, but I am not a canning expert and have no idea how you would go about doing it. If refrigerated, use or freeze it within 1 week.
Easy Blueberry Sauce & Syrup
1 cup water
2/3 cup sugar
1/4 cup strained fresh lemon juice
2 tablespoons cornstarch
2 cups blueberries
1 teaspoon vanilla
Instructions:
Combine the water, sugar, lemon juice, and corn starch in a medium-sized heavy saucepan. Bring to a boil, stirring frequently, and cook 1-2 minutes until thickened. Add the blueberries and cook for 5 minutes. Remove from heat and add the vanilla. You can either mash or blend the berries (like for syrup) or leave them whole (to use as a topping). Serve warm and refrigerate the leftovers for up to
When it comes to holiday goodie-giving, you’ve got the go-to regulars, like fudge and sugar cookies, and you’ve got the last-minute, like store-bought chocolate bars, but sometimes you need something impressive. Something extra special. Something that says, I just ground my own hazelnuts for this stuff, yo. When I was flipping through a recent issue of Bon Appetite and came across something titled “Better-Than-Nutella” I was intrigued. Then I saw the ingredient list and I was sold. This stuff is crazy good, sinfully decadent, and perfectly perfect for gift giving this holiday season. Or for stashing in the back of your fridge for midnight snack binges. Your call.
If you can find hazelnuts without skins, buy them! I will not try to fool you by saying it’s no big deal to remove hazelnut skins. It’s actually one of the most annoying things ever. However, the finished product here is so crazy good that it’s worth the labor of love. **EDIT: Some readers have noted this easy way of skinning the nuts. However, others who have tried it have found that boiling the nuts sometimes removes some of the natural oils and consequently the nuts don’t reach a creamy/buttery stage. So keep that in mind if you try it!
I recommend buying the nuts in a grocery store that sells bulk items- they shouldn’t be too expensive there. You only need 10 ounces and they were less than $5/lb at both stores I shop at.
First thing we’ll do is toast the nuts. Toasting brings out the oils and adds flavor and depth. Place the nuts (skins and all) in a dry skillet or baking pan and bake at 350 for about 15 minutes.
Even if your nuts have skins on them you should be able to see some of the light colored nut so you can tell when they turn toasty brown. After they come out of the oven, let them cool completely.
If your nuts have skins on them like mine, you’ll need to remove as much of them as you can. Put about half at a time in a dish towl and rub them around vigorously. You can kind of make a little pouch out of the town and rub the bundle between your hands. When you open it up you can pick out the ones where the skins fell off easily and rub away at the rest. You might have to do this several times and you may find yourself muttering naughty words under your breath. Keep your eye on the prize, people. (And if you missed the edit above, check out these tips for easier skin removal!)
Once those are cool, pop them in a food processor, or high-powered blender (like a Blendtec or Vitamix). I used the new twister jar Blendtec has and it worked like a charm. You’ll notice I didn’t remove EVERY last spec of skin from my nuts- that’s nearly impossible. Just get off as much as you can.
Blend those nuts up with a little sugar. At first you’ll get a crumbly mixture
And the more you blend you’ll get a nice nut-butter consistency. The original recipe calls for granulated sugar, but I found in some of my batches the sugar left a grainy consistency, so I used powdered sugar instead and it was perfect.
Once you blend that up, set it aside while you melt your chocolate. Place a metal or glass bowl over a pot of simmering water to gently melt the chocolate. If you’re careful, you could melt it in a glass bowl in the microwave as well.
Remove the pan from heat and whisk in some room temperature butter. If you use unsalted butter you’ll want to add 3/4 teaspoons kosher salt as well. I just use regular salted butter and add no additional salt.
Once the butter is whisked and incorporated, you’ll add in a cup of heavy cream.
You know the Mom in the Nutella commercials who tells you that it’s made with healthy ingredients like skim milk and totally part of a nutritious breakfast when spread on whole wheat toast? Yeah, don’t confuse me with her.
Add in your nut butter and that’s it. While it’s warm it will be a pourable consistency; pour into jars. This makes about 4 cups, so you can get four 8-oz jars, or 8 4-oz jars.
Once the mixture comes to room temperature it will thicken and have the consistency of peanut butter (or Nutella).
This is to be served at room temperature since it will be too hard to spread once it’s chilled. It can stay at room temp for 4 days, but I keep it in the fridge and then bring it to room temp before serving (or warm in microwave very briefly, like 5 seconds)
The chocolate is creamy and smooth, but there are small bits from the nuts in there adding awesome texture.
This is a gloriously decadent and impressive holiday gift. It’s yummy on toast or with dippers like pretzels or graham crackers. If you have a Fred Meyer store (or I believe Kroger sells this label) these little buttery cookies are amaaaazing with this stuff.
Chocolate-Hazelnut Spread {Homemade Better-than-Nutella} Slightly adapted from Bon Appetite, December 2012
1/2 cup (1 stick) butter, cut into 1-inch pieces, room temperature
1 cup heavy cream
jars or containers (will fill 4 8-ounce jars)
Preparation
Preheat oven to 350°. Spread out nuts on a rimmed baking sheet or in an ovenproof skillet. Roast, shaking sheet once for even toasting, until golden brown, 13-15 minutes. Let cool completely. (If nuts have skins, rub them in a kitchen towel to remove, see photos in post for tips.)
Grind hazelnuts and sugar in a food processor until a fairly smooth, buttery paste forms, about 1 minute. You can use granulated sugar, or I prefer powdered sugar for a creamier consistency.
Place chocolate in a medium metal or glass bowl. Set bowl over a large saucepan of simmering water; stir often until chocolate is melted and smooth. Remove bowl from over saucepan; add butter and whisk until completely incorporated. Whisk in cream, then hazelnut paste.
Pour mixture into jars, dividing equally. Let cool (you can pop it in the fridge to speed up cooling). Mixture will thicken and become soft and peanut butter-like as it cools. Screw on lids.DO AHEAD This can be made up to 4 weeks ahead; keep chilled. Let stand at room temperature for 4 hours to soften. Can stand at room temperature up to 4 days.
**Don’t forget- our awesome holiday Mega-Giveaway is going on now! Enter for your chance to win a DLSR camera, an i-pad, a lap top and more! CLICK HERE FOR INFO.**
Yes, I do realize that the Super Bowl is this weekend. I also realize that this isn’t really your typical Super Bowl fare. Although it could be–I mean, what’s not to like? Avocado? Good. Cilantro? Good? Jam? Good. Kidding about the jam, 5 million dollars if you catch reference. Also kidding about the 5 million dollars. If I had 5 million dollars, let alone 5 million dollars to get away, I’d be hiding in a tropical location, eating Reese’s Peanut Butter Cups on the beach.
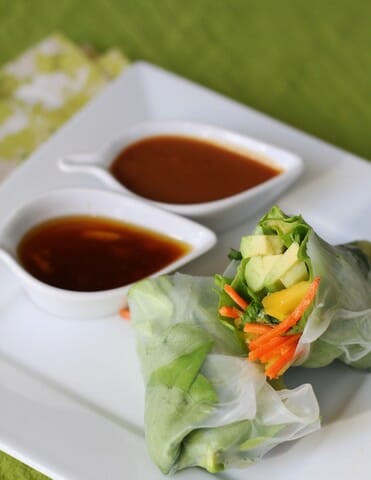
The first time I ever had fresh spring rolls was in college when my roommate Sara made them for us, the same Sara who gave my the Spanish Rice recipe. They were so fun and so different from anything I’d ever eaten before. Since then, I’ve expanded what I put in spring rolls–a little sushi rice, cucumbers, avocados, and spicy sushi mayo like it’s a spicy California roll, Asian salad dressing and nuts like it’s a salad, and the sauce from our Thai Peanut Noodles for dipping or drizzling inside the rolls. Seriously, you really can’t go wrong here–you’re not going to screw up the spring roll because everything tastes good together. These can be as healthy or as naughty as you want them to be. It’s all part of the fun.
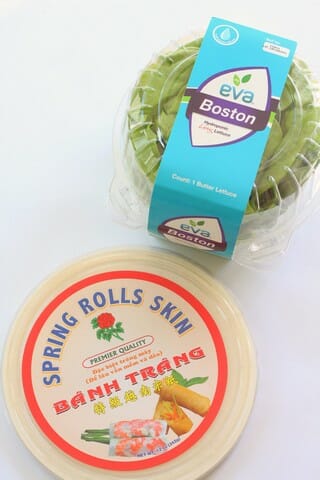
First, you’re going to need something to wrap them in. You can do them in spring roll wrappers or you can just wrap them in butter lettuce if you’re watching your carbs.
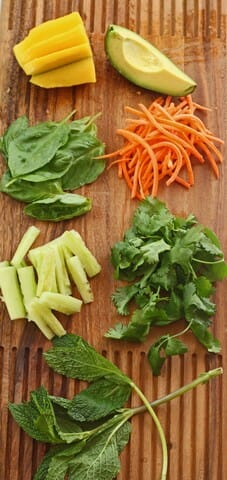
You’ll also need an assortment of fillings.
In this picture, I have avocado, mango, basil, shredded carrots, cucumber, cilantro, and mint. Off the top of my head, here’s a more complete list of ideas for fillings:
I made mine vegetarian, but you could definitely throw in some grilled shrimp, steak, or chicken. However, given the post-spring-roll disastrous state of my kitchen without cooking meat, I personally would probably forgo it unless Tim Riggins was coming over for dinner. Or Tammy Taylor, because I so desperately want her to like me. She’s not fictional, not fictional, not fictional.
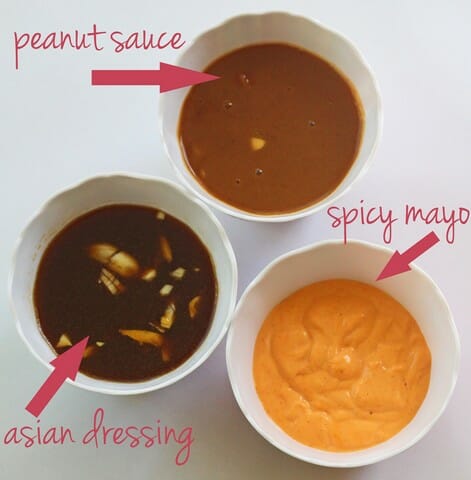
The first thing to do is to make your dipping sauces. I made 3 that are pretty different, and you can mix and match them however you want to. First, I made that spicy mayo that you sometimes get on spicy sushi rolls. Then I made a sweet and savory peanut sauce and an Asian-inspired vinaigrette.
You can do this a few days ahead of time if you want to save yourself some work on the day of the spring rolling.
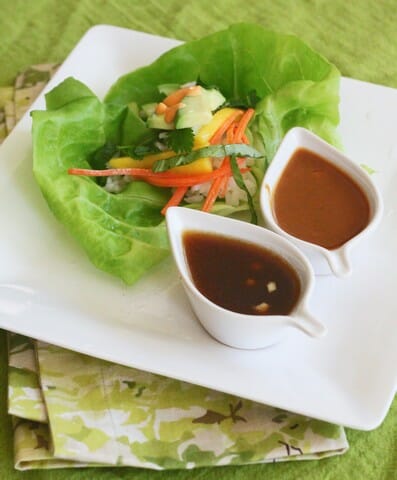
If you just want to make lettuce wraps and forgo the rice wrappers, wash your lettuce (actually, wash it either way). I like using butter lettuce because it’s large, flexible, and has a nice, sweet flavor. All you need to do is fill your lettuce leaves with your desired toppings and enjoy!
If you’re using the rice paper wrappers, fill a medium mixing bowl or a shallow saucepan with very warm water. Working with one rice wrapper at a time, soak until softened and flexible, so it kind of looks like plastic wrap. Lay the softened wrapper flat, then lay a piece of butter lettuce on top of it. Add desired toppings on top of the lettuce and, if you’d like, any sauces (you can also dip them later.) Carefully roll up as tightly as possible, starting with the right and left sides, then fold up the bottom, then folding the top over and rolling tightly(ish).
These can be assembled ahead of time, placed on a parchment-lined baking sheet, and refrigerated, or when you serve them, you can allow your eaters to make their own spring rolls.
These are so fun for a crowd SO delicious. Like awesome restaurant delicious. But in case that’s not gonna cut it for you and your Super Bowl party, here’s a link to the Appetizer section of the blog–poke around and I’m sure you’ll find something amazing for your game-watching enjoyment!
Fresh Spring Rolls {& Lettuce Wraps} with 3 Dipping Sauces Our Best Bites
Ingredients:
Rice paper wrappers/spring roll skins/banh trang
Butter lettuce, washed
Fill a medium mixing bowl or a shallow saucepan with very warm water. Working with one rice wrapper at a time, soak until softened and flexible, so it kind of looks like plastic wrap. Lay the softened wrapper flat, then lay a piece of butter lettuce on top of it. Add desired toppings on top of the lettuce and, if you’d like, any sauces (you can also dip them later.) Carefully roll up as tightly as possible, starting with the right and left sides, then fold up the bottom, then folding the top over and rolling tightly(ish). These can be assembled ahead of time, placed on a parchment-lined baking sheet, and refrigerated, or when you serve them, you can allow your eaters to make their own spring rolls.
1/2 cup mayonnaise (light mayo is fine)
2 tablespoons Sriracha sauce
1 teaspoon lime juice (optional)
Whisk ingredients together. This will be spicy and a little goes a long way–try spooning it into a Ziploc bag and cut the corner so the sauce can be lightly drizzled or dotted over your food as desired.
1/2 c. chicken broth, vegetable broth, or water
3 tablespoons creamy peanut butter
Sriracha chili sauce to taste
1 1/2 tablespoons honey
3 tablespoons soy sauce
1 1/2 tablespoons fresh minced ginger
2-3 cloves garlic, pressed or minced
Combine ingredients in a microwave-safe bowl and heat on high for 1 minute. Whisk to combine. If not completely smooth, cook for another 30 seconds-1 minute.
Have you ever found yourself wandering through Costco or Sam’s Club, nibbling on samples as you play consumer Tetris with your shopping cart and the 6-pack of toilet bowl cleaner, the 3 giant boxes of Fat Boys (glory hallelujah, they found their way to Louisiana), that bag of chocolate covered pomegranate somethings that you sampled and decided that you needed, and then massive amounts of produce because it’s all so pretty and you feel super awesome loading up your cart with all these fresh fruits and veggies (yes, I can hear the keyboard clicks now talking about the evils of buying produce from big box stores and how those big, fat strawberries and juicy golden peaches were actually harvested by Satan himself and how I should be buying organic, local produce. True story: there is literally no organic local produce where I live right now. So it’s Sam’s Club or scurvy.) And then you get home and realize that you have a 12-pack of mangoes and 7 pounds of strawberries and a whole mess of avocados that are perfectly ripe, which means that by the time you wake up tomorrow, they will be overripe and yucky.
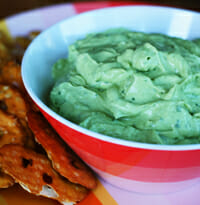
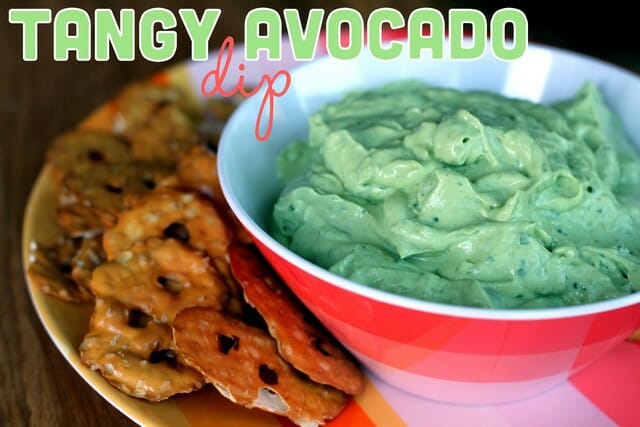
And then you remember a post you saw on Two Peas and Their Pod for a creamy, yogurty avocado dip. And you can’t find the recipe because you’re running on about 3 brain cells, so you try to remember what was in it and start throwing things together. And you’re not sure if it was right or not, but you ARE sure that it’s delicious and an amazing dip for your favorite carbs or veggies or for spooning into the pork carnitas you made for dinner. And the best part is that it’s full of things that are good for you–good fats from the avocados, protein and probiotics and no fat from the yogurt, deliciousness from the garlic and spices and lime juice.
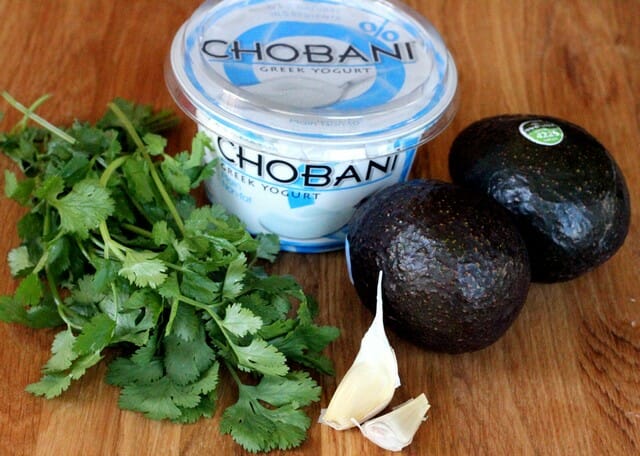
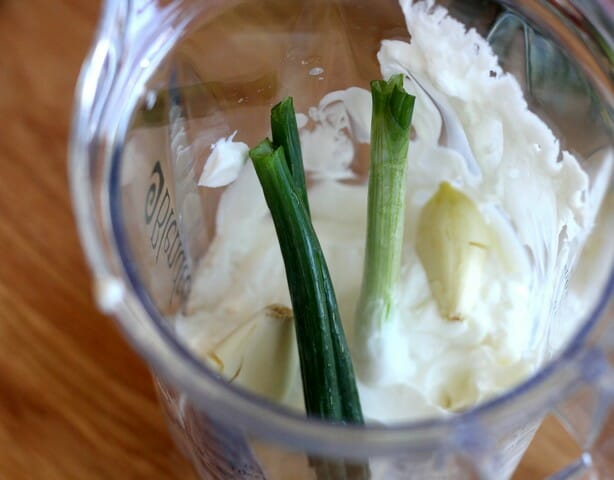
You’re going to need cilantro, garlic, fat free plain Greek yogurt, and 2 large, ripe avocados.
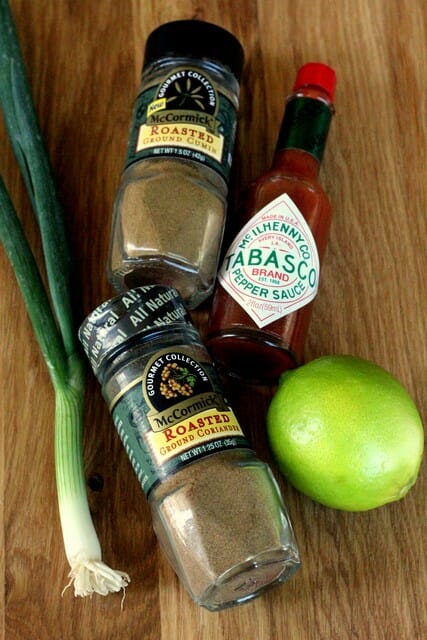
and then you’re going to need 1 green onion, ground cumin, ground coriander, the juice of 1 lime, and Tabasco sauce.
Combine all the ingredients except for the cilantro in the jar of your blender or in a container you can use your immersion blender with.
Blend until smooth. Then add about 1/4 cup cilantro (a small handful) and pulse until it’s incorporated and is the size/texture that you want. Season with kosher salt and Tabasco sauce to taste. If possible, refrigerate for 30-60 minutes before serving.
3/4 cup fat free plain Greek yogurt
2 large ripe avocados, peeled and pitted
2 cloves garlic
1 green onion, trimmed of the “hairy” end and the super-floppy end
Juice of 1 lime
1/4 teaspoon ground coriander
1/4 teaspoon ground cumin
1/2 teaspoon kosher salt
Tabasco sauce to taste
About 1/4 cup cilantro (a small handful)
Instructions:
Combine ingredients through the salt, plus about 10 drops of Tabasco in the jar of your blender (or you can use an immersion blender). Blend until smooth. Add the cilantro and pulse until combined and the cilantro is in small pieces but not blended completely smooth. Season with Tabasco and additional salt to taste. If possible, allow to chill for at least 30 minutes-1 hour before serving. Serve with pretzel chips, pita chips, tortilla chips, fresh veggies, or in tacos, burritos, and other Tex-Mex tastiness.
I remember a few times when I was a kid and my parents went to Hawaii sans children. I thought that was super rude, not only because they visited a tropical paradise while the rest of us did the whole Logan, Utah winter thing (it’s a thing, I promise), but also that they thought it was okay to leave us (I kind of get that now…) When my parents came back, though, they always came laden with fresh pineapple from Hawaii because buying a whole pineapple on this side of the Pacific Ocean was prohibitively expensive (totally unlike their trip to Hawaii…still.not.bitter…) in those days. So it’s always kind of a shock to my system when I’m at the grocery store and I see whole fresh pineapples for, like, $1.87 each and I feel like I have to buy 22 of them and hoard them in Gollum-like fashion.
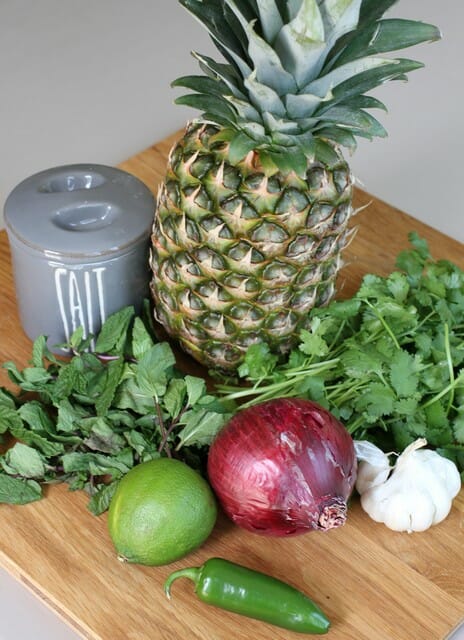
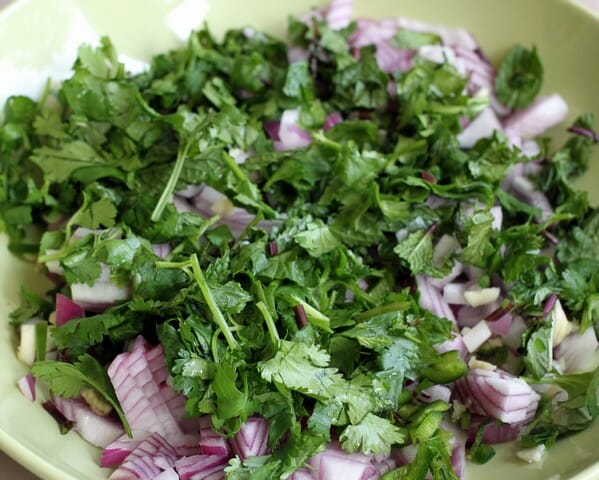
We have an awesome recipe for pineapple salsa in our new cookbook, but this one’s a bit different–it’s always good to have more than one way to use up those 22 precious pineapples. You’re going to need a pound of fresh pineapple (if you’re using a whole pineapple, that’s a pound after you get it to a point where you could eat it without seriously harming yourself), a jalapeno, fresh cilantro, fresh mint, a small red onion, a lime, and some garlic.
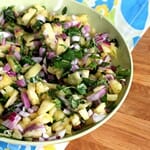
Mince the garlic, red onion, the jalapeno (seeded if you’re worried about heat, which I am) and toss them together in a small mixing bowl.
Chop the pineapple into small pieces and add it to the mixture.
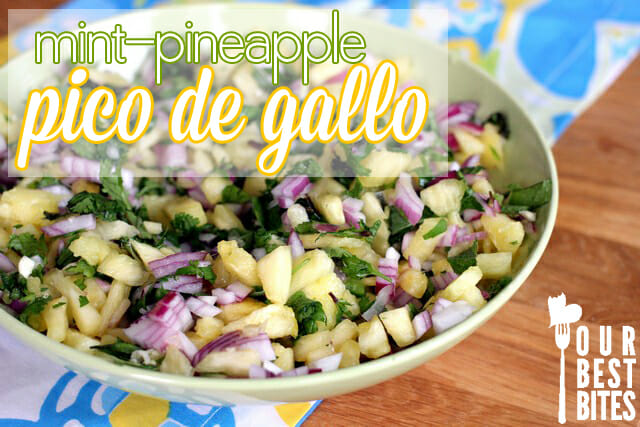
Squeeze the lime juice over the pineapple and season it with salt to taste. If possible, allow it to stand for 30 minutes before serving. You can serve this with tortilla chips or so many Asian and Latin recipes, especially ones that are cooked on the grill (and stay tuned for a few recipes in the near future where you can use this up!)
Mint-Pineapple Pico de Gallo
Recipe by Our Best Bites
Ingredients:
1 small red onion, minced
3 cloves garlic, minced
1 jalapeno, minced (seeded, if desired, to reduce heat)
1/2 cup chopped fresh cilantro
1/2 cup chopped fresh mint leaves
1 pound fresh pineapple, cut into small pieces (you can also use 1/2 pound mango, 1/2 pound pineapple)
Juice of 1 lime
kosher salt
Instructions:
Combine all ingredients except for the salt in a small mixing bowl. Season to taste with salt. If possible, allow to stand for 30 minutes at room temperature before serving. This will keep for 2-3 days in the refrigerator.
So growing up in Utah, I pretty much thought that July 24 was a national holiday celebrated by all with fireworks and work being cancelled. And then I got married to a non-Utah boy who didn’t understand why life shut down every Pioneer Day. Now that I don’t live in Utah anymore, July 24, the day Utah celebrates the pioneers reaching Salt Lake City and deciding that was the place, is barely a blip on my radar, but growing up, it was a day full of pioneer bonnets, neighborhood bike parades, and butter-making. We knew how to get down.
Anxious to impart to my children the traditions of my childhood, in preparation for the big day, we decided to make our own butter this year.
I almost ordered my daughter a pioneer bonnet and my son a wide-rimmed hat (seriously, they were in my Amazon shopping cart), but I could actually see their scowling, sweaty faces under their hatted heads, shaking mason jars full of cream in the Louisiana heat (because it must be done outside) and I decided it was a lot of money to spend on torturing my children for my own amusement, so I refrained.
For the actual butter, you’re going to need heavy whipping cream and salt. I like kosher salt, but flaked sea salt would also be delicious. I think regular table salt is a little heavy-handed here and takes away from the sweet, delicate flavor of the butter, and coarser sea salts may not dissolve in the butter, which most people don’t really dig.
If you want to make a garlic-herb variation, you’ll also need a clove of garlic, a tablespoon of chopped fresh chives, and a teaspoon of chopped fresh parsley for every 4 ounces of butter.
To make the butter by hand, fill a jar that has a lid halfway full with heavy whipping cream.
Place the lids on the jar and shake the jars vigorously until solids form (this took us about 10 minutes of consistent shaking). You should have a light yellow lump surrounded by thinner liquid.
I cheated and poured the rest of my cream into the bowl of my KitchenAid and whipped it until it separated. It looked curdled, but it was actually small bits of butter floating in the “buttermilk.” I lined a strainer with a clean dish towel (think super clean, not clean like you just pulled it out of the drier with the cat’s favorite blankets…and cheesecloth would have been ideal, but I didn’t have any) and poured the contents of the bowl into the strainer. Over your sink. Sometimes I have to stress the obvious.
If you’re going the handmade route, you’ll still need to separate the butter from the buttermilk, so just pour it into the cloth the same way.
I know it looks scary. I’m not even going to go into all the things it could look like, but don’t be scared. It’s all going to be okay. We’re making butter.
Twist the top of the towel around the butter, making a ball. A butterball.
Squeeze as much of the liquid out of the butter as you can. There will bet a lot of liquid. Don’t be alarmed–assuming you used at least a pint of cream, you’ll still have plenty of butter. Keep squeezing until you’re not getting any liquid out, then open up the towel.
Isn’t it gorgeous?! It’s so fun to see it all come together.
Transfer the butter to a clean cutting board, but keep the towel close by to soak up any rogue liquid you might encounter as you work with it. Sprinkle it with salt.
Using your fingers, knead the salt into the butter, using the towel/cheesecloth to soak up any liquid. Just salt it to taste, but keep in mind that it will become saltier over time as the salt dissolves.
If you want to add some herbs, measure out about 1/2 cup of butter and then add 1 tablespoon chopped fresh chives, 1 teaspoon chopped fresh parsley, and a chopped clove of garlic.
Mix it in with your hands (yes, I know this is getting very hands-on, but really, it’s the best way) and then transfer into a container for serving/storage.
I’m not sure how long this will keep–ours has never made it very long. The more liquid you get out of it, the longer it will last. Just be sure to store it in the refrigerator. As far as baking goes, I’d be a little hesitant to use it here; sure, they did it once upon a time, but today’s baking recipes are pretty much always formulated for commercial butter and you never know what variables could exist in homemade butter; we use ours for eating (on stuff…not straight up). 1 pint of cream will yield about 1 cup of butter.
How To: Homemade Butter (Salted & Garlic-Herb) By Our Best Bites
Ingredients:
Heavy whipping cream (some naysayers say that ultra-pasteurized doesn’t work, but that’s all I can find and we’ve done just fine)
Flaked sea salt or Kosher salt
1 clove garlic (optional)
1 teaspoon fresh parsley, minced (optional)
1 tablespoon fresh chives, minced (optional)
Instructions:
Handmade: Fill a jar with a lid about halfway full with cream. Place the lid on the jar and shake until you get a buttery lump. Place the lump in a clean towel and twist the top of the cloth around the butterball, squeezing the excess liquid out. Salt to taste. If desired, add chopped herbs. Refrigerate.
Electric mixer/blender: Pour at least 1 pint of cream into the bowl of a mixer/jar of a blender/mixing bowl (to use a hand-held electric mixer). Blend/mix until the butter and milk separate. Pour into a towel-/cheesecloth-lined strainer. Twist the towel around the top of the butter and squeeze out as much excess liquid as possible. Turn the butter onto a clean cutting board/plate and salt to taste (keep in mind it will get saltier with time), mopping up any excess liquid with the towel or cheesecloth. If desired, add the chopped herbs and refrigerate.
1 pint of cream yields approximately 1 cup butter.
I just got home from a wonderful, whirlwind trip to my hometown of Seattle. We actually started out in Portland (another favorite city) where my husband and I spent our newlywed years. If you follow me on Instagram, you saw that my little sister, the baby of the family, got married to her sweetheart in a beautiful ceremony on Friday. Kate’s mother-in-law, a good friend of my family, actually did all of the wedding flowers! She did my flowers too, almost 10 years ago, long before Kate and I ever even met one another. People always ask how Kate and I met, and that’s how. It was through her husband’s family.
My favorite part about my sister’s bouquet was that beautiful beaded embellishment. It came from our Mom’s wedding dress, and I thought it was the most perfect tribute.
After the wedding was all over and the bride and groom were long gone, we went and did something I’ve always wanted to do. I’m not a crazy person, so I would (in the words of Taylor Swift) never, ever, ever jump out of an airplane, but indoor skydiving sounded like a total blast. And it was.
If you have an ifly near you, check it out. It was a dream come true for our kids and I would do it again and again if I lived close to one! Check out this video I posted of our instructor- totally awesome.
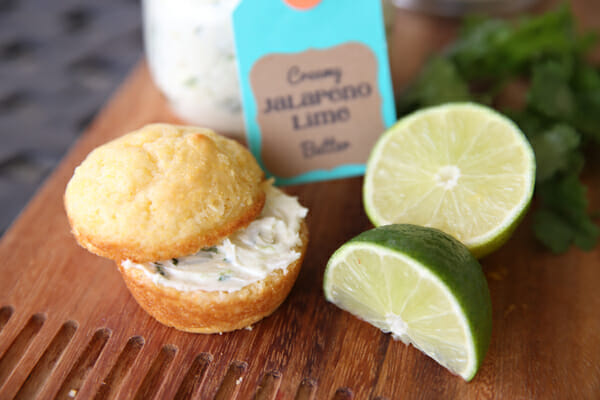
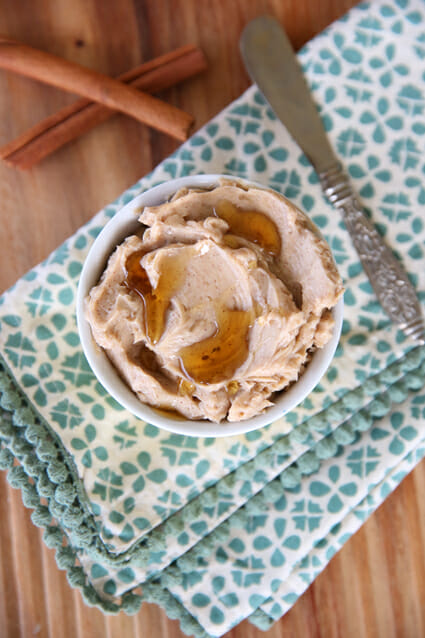
So anyway, now here I am, at 10 pm remembering I have a blog post to write! And in a way, this recipe is perfectly fitting for today. Sometimes I have a tendency to over-do things. To make things more complicated than they need to be. I have to say, my husband has been a good influence on me in the past 9 1/2 years of marriage because he’s constantly reminding me to keep things simple. With food, it’s so easy to over-think and over-do, and so often the best things are incredibly simple. One of my favorite things to make for company, or to take to a party, is a simple compound butter. They’re so easy, and so quick, and all you have to do is grab a yummy loaf of bread at the grocery store bakery, and you made something completely impressive and delicious with a little more than zero effort. I make both sweet and savory butters all the time, and this is one of everyone’s favorites. My sister-in-law made us cranberry-orange butter last Christmas and I came up with this recipe after eating that one.
The butter starts with a toned-down version of our classic honey butter, with a touch of powdered sugar and honey for sweetness. Whipping that all together makes the butter light and fluffy to start with, and then we can add in some flavor. Zest in the zest from one whole orange to add pretty flecks of bright orange color and also bursts of citrus flavor. You’ll also add some chopped dried berries. I know some people add fresh berries to compound butters, but it can get tricky because you’re introducing moisture into the mix and it can cause the butter to start separating and make a big mess. So I find that my method (with 2 options below) works well consistently and stores longer, as well.
You can usually find a variety of of dried berries at the grocery store (and even more at stores that sell bulk items, and health food stores). I like the bagged mixes that have strawberries and blueberries, and cherries in them. You can always use dried cranberries, but I do prefer at least a mix of that contains the other berries as well. You’ll also want to chop them quite finely so they’re small enough to spread nicely. Add them right into the butter and mix them in.
Using freeze dried berries is another option, and I like to make this with a combination of both. But you can certainly use just one or the other. You can find freeze dried berries in more and more places these days. The ones pictured are from Target. Freeze dried berries are light and crunchy, and kind of melt in your mouth. They’re the kind of berries you find in cereal. The trick when using them here is to allow the butter enough time to sit before serving so the berries can absorb some moisture and lose their crunch.
You’ll also want to smash them pretty finely so they just blend in and are able to soften up.
Use an electric mixer to beat it all together. Beating helps to incorporate some air into the mix so the finished texture is really light and fluffy.
This makes such a great hostess gift with a cute little tag on it. Or pop it in a basket with a fresh loaf of bread or muffins for a really nice neighbor gift or pick-me-up for a friend. (Nothing picks-me-up like butter.)
It needs to be stored in the fridge, but you’ll want to serve it at room temp, so if it’s chilled, just leave it out for about 20 minutes before serving.
It’s so yummy on cornbread, baguette slices, or a piece of toast, and especially pancakes,crepes, andwaffles. Or a sugar cookie. Or graham crackers. Or anything else you can possibly find in your pantry when you are out of all of the other things I just mentioned. You always have spoons, and eating butter from a spoon is completely acceptable if it’s flavored butter and there are no witnesses.
Sweet Orange-Berry Butter Recipe by Our Best Bites
Ingredients1 cup real butter, at room temperature
3 tablespoons honey
2 tablespoons powdered sugar
zest from one large orange
3 tablespoons finely chopped dried berries (I like a of strawberries, blueberries and cherries)
1-2 tablespoons crushed freeze dried berries
Instructions
Beat butter, honey, and powdered sugar with an electric mixer for 1-2 minutes, until light and fluffy. Add in remaining ingredients and beat at medium-high speed until combined. Serve at room temperature on toast or french bread, waffles, muffins, cornbread, pancakes, crepes, etc.
note: add berries to taste and sub all dried, or all freeze-dried as desired. If using freeze dried fruit, I recommend letting the butter sit for at least 6-8 hours, or overnight before serving, for best results.
If you’re in the mood for a dinner recipe- you’re in luck! We added a new bonus recipe to our dinner inspiration page today! Click the green box on our sidebar (or right here) to check it out!
With the onset of October, the entire blogosphere is erupting with pumpkin this week. So the fact that I’m posting something with bright summer flavor might seem strange, but stick with me here. We’re all about the pumpkin-madness (hello- just look at our sidebar!) but the arrival of cool autumn days also means the arrival of warm autumn dinners. At least one night a week at my house, from now until about March, there is some sort of soup or stew simmering away at dinner time. And there is undoubtedly some sort of warm, bready, carbohydrate along side it. When I make a hearty soup, I often just grab a loaf of french bread to go along with it, and I love making a flavored butter to spread on it. I swear to you that warm buttered fresh bread dunked in hot, homemade soup is one of life’s greatest pleasures. I make a lot of compound butters, and this is one of my most favorites. It’s spiked with fresh lime and garlic and a little kick from some jalapeno. I love, love, love it served with bread or corn bread along side our White Chicken Chili, Chipotle Chocolate Chili, Chicken Tortilla Soup, Creamy Corn Chowder, or Black Bean and Sweet Potato Chili.
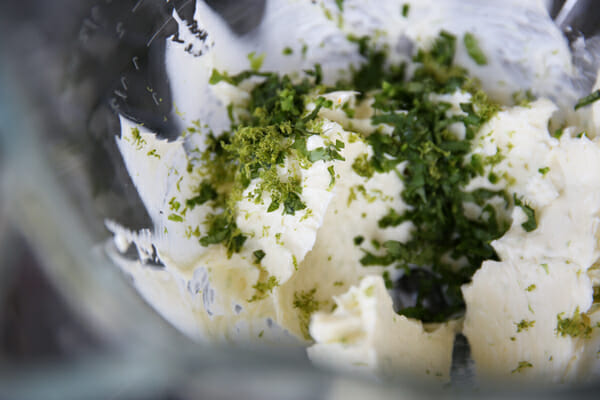
It starts with a little bit of a secret ingredient.
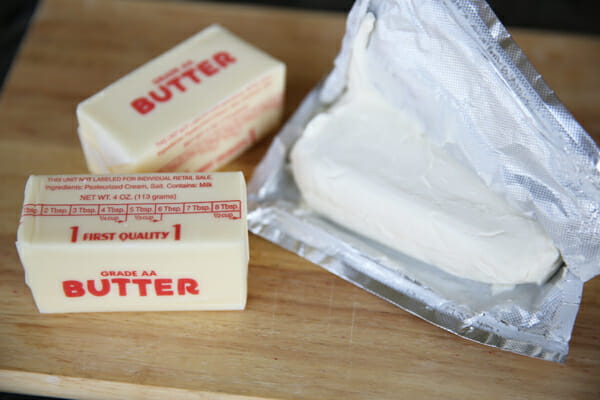
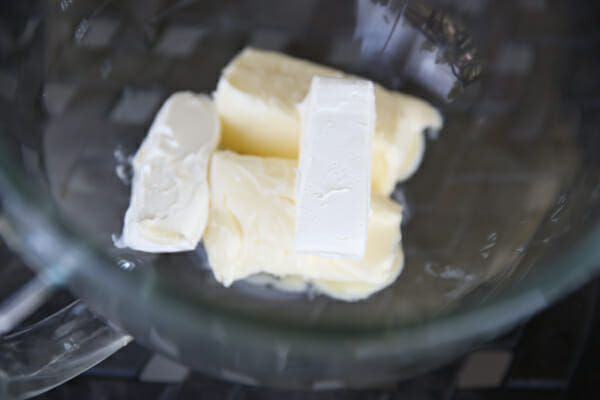
Adding just a little bit of cream cheese to the butter makes the overall consistency extra creamy and whipped, and the flavor is smooth with just a little bit of tang. The butter and cream cheese together just sort of melt into this perfect consistency when slathered on hot bread. So start with your butter (real butter. I can’t say that enough. If you make this with any form of margarine, you’re fired from reading this blog. Forever.) and cream cheese at room temperature. Yes, this takes a little bit of planning, but it really makes the finished product so much better.
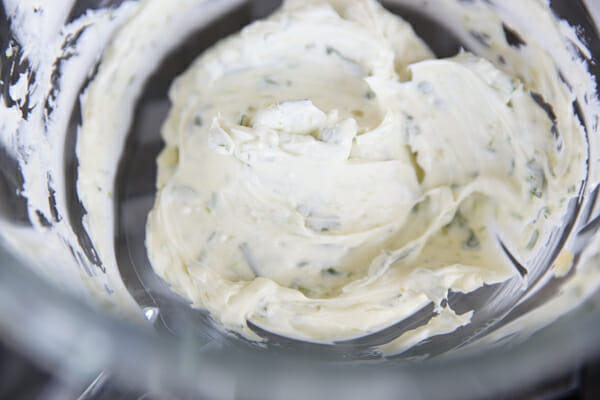
Whip those together until they’re creamy and smooth and then add in the flavor:
I add minced jalapeño- and you can add as much as you want depending on how spicy you want it. But I do suggest that you mince it as small as possible so you don’t have any huge chunks of raw hot peppers in there. Also the zest of one lime, and a little juice, some fresh garlic, and chopped fresh cilantro.
Whip those together until the mixture is light and fluffy and everything is distributed. Give it a little taste and sprinkle in a little kosher salt if you feel it needs it.
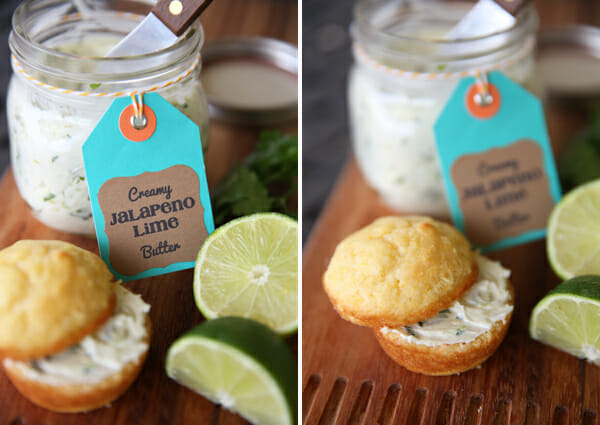
With the holidays coming up, this makes a really cute hostess gift.
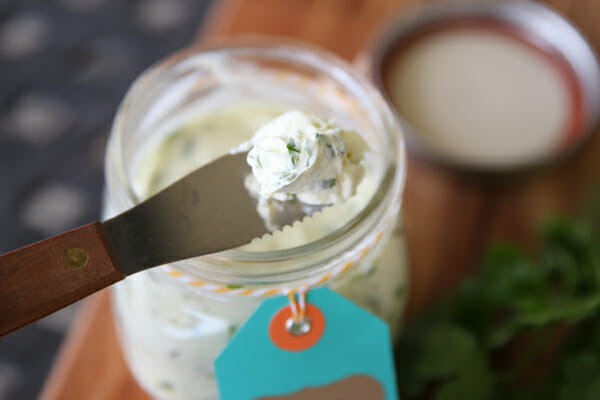
Just put it in a cute jar and tie a tag on it and you’re good to go. It’s also such a quick and easy side-dish to bring to a pot-luck, tailgating, or a dinner party. Just bring along a loaf of crusty french bread or a basket of corn muffins and let people slather away.
I love it on french bread or corn bread, or even toast (I love it on sourdough!)
The absolute best thing in the world is when you spread it on warm french bread and then dip the bread in White Chicken Chili. Seriously, one of my most favorite things ever.
Creamy Jalapeño-Lime Butter Recipe by Our Best Bites
Ingredients
1 cup (2 sticks) real butter, at room temperature
4 ounces cream cheese (low fat is fine, avoid fat free), at room temperature
1/4 teaspoon finely minced garlic
zest from one large lime
2 teaspoons fresh lime juice (more to taste, if desired)
1-2 teaspoons finely minced jalapeno
2-3 tablespoons chopped fresh cilantro
Instructions
Beat butter and cream cheese together until well blended and light and fluffy. Add in garlic, lime zest, lime juice, jalapeño, and cilantro. Mix until everything is well distributed. Spread on bread or corn bread. When not in use, store in fridge and bring to room temperature before serving again.
Do you all follow us on Facebook? Make sure to select “Show in Feed” so you don’t miss out on the amazing recipes we’ll be sharing there all month long! We love connecting with you all on social media, so be sure to check us out not only on facebook, Pinterest, Twitter, and Instagram, too!
–FYI, this is Sara! I don’t know why we’ve been having some technical glitches lately that have been causing our signatures to disappear. Imagine my smiling face right here!
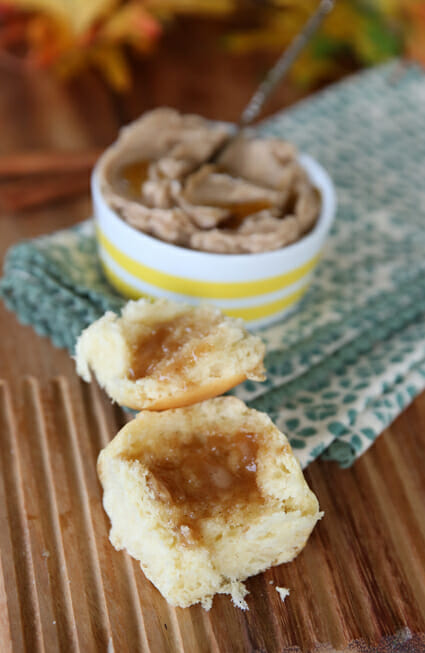
Somehow October came and went and now people are already in the midst of planning Thanksgiving menus! We even had snow on the ground this morning, and according to my Instagram feed, we weren’t the only ones. Mother nature isn’t wasting any time. So who’s in charge of the rolls this year? If you want to know how to win friends and influence people, make this butter to go with them. If you’re serving a crowd, multiply it by 100. Or 4, or whatever. It’s amazingly easy, and makes everything it touches taste like a maple doughnut. Enough said.
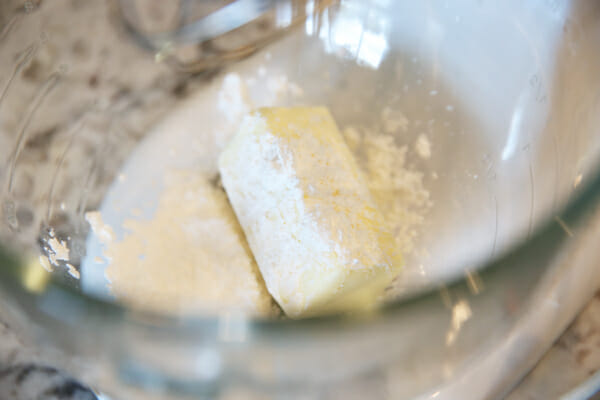
Start with real butter- absolutely no exceptions here. And one of my secrets to fluffy, sweet compound butters: a little powdered sugar.
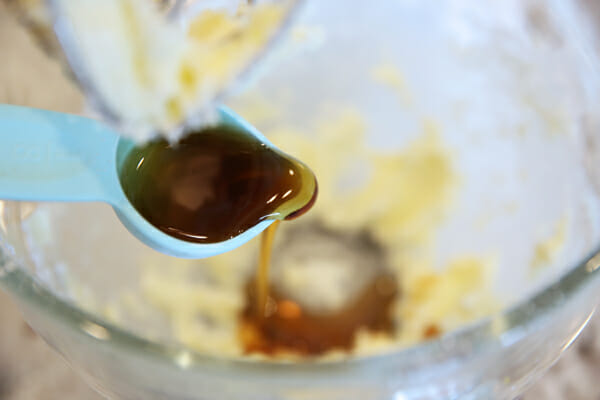
Next, drizzle in a little maple syrup
And when I say maple syrup, I’m talking about the good stuff. There’s a time and a place for Mrs. Butterworth’s, but I always recommend keeping a bottle of 100% pure maple syrup, which is significantly more expensive, on-hand for recipes.
We’ll also add in some ground cinnamon and if you have some, a little pumpkin pie spice too. If you don’t have pumpkin pie spice, you can leave it out, or add in a dash of nutmeg and/or cloves.
Then beat, beat, beat, with the whisk attachment on a stand mixer, or a regular hand mixer. One of the tricks of getting really light and fluffy butter is to whip lots of air into it, so let it go for a good minute or two.
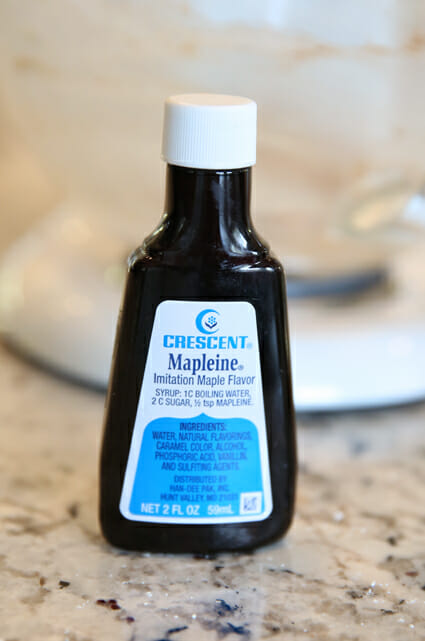
Now, you don’t have to add maple extract. If you don’t have any already and don’t want to buy it, it’s not a big deal. But if you have some around anyway, I add just a little bit for an extra punch of maple flavor. You might want to sample your butter and decide if you want to add it.
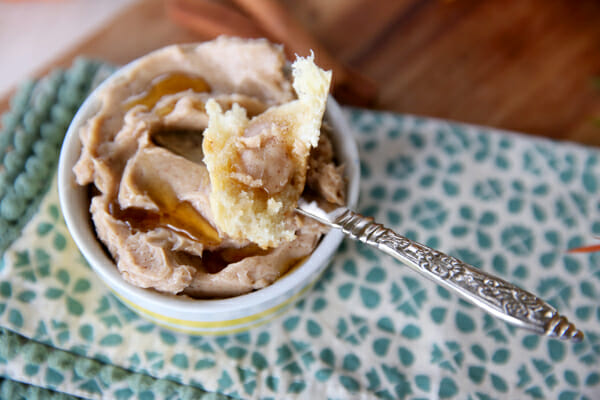
When it’s all whipped up, place it in a container, and I like to drizzle a little maple syrup on top for serving.
It’s crazy out-of-this-world good on hot rolls. Also delish on cornbread, toast, french toast, pancakes, waffles, etc.
When it melts into something warm, it’s like pure magic.
Whipped Maple Cinnamon Butter Recipe by Our Best Bites
Ingredients
1/2 cup (1 stick) real butter
2 tablespoons powdered sugar
2 1/2 tablespoons 100% real maple syrup
1/4 teaspoon ground cinnamon
1/8 teaspoon pumpkin pie spice (optional)
1/4 teaspoon maple extract (optional)
Instructions
Place butter and powdered sugar in a mixing bowl and beat (with a hand mixer, or the whisk attachment of your stand mixer) until combined and smooth. Add maple syrup, cinnamon, pie spice, and extract. Beat slowly until combined and then whip for 1-2 minutes until light and fluffy. Serve at room temperature and drizzle with maple syrup before serving.
If you’re making ahead of time, store in fridge, but allow time to bring to room temperature before serving. For best results, stir or re-whip before serving. Lasts for about a week or so in the fridge, several months in the freezer.
(I see our Pin button and signature is all messed up again- sorry for that inconvenience!)
Okay. So. It’s not exactly news that I’m not a huge fan of Mexican food in Louisiana (well, where I live in Louisiana–I’m willing to bet that there are other parts of Louisiana that have delicious Mexican food, but alas, they are not here.
But.
One of the things I love about living where we do is our close proximity to Texas. We make several Texas trips every year and every time we do, we pretty much exclusively eat Mexican, Tex-Mex, Fresh-Mex, anything we can get our hands on.
Mock me if you want, but I have only recently discovered white queso dip. In case you’re also unfamiliar with it, it’s usually kind of a thin, white, melty, cheesy dip that you use for tortillas chips. I like it better than the yellow nacho-y cheese dip, but really, it’s melted white American cheese.
And then…then…I tried one with lime and garlic and cilantro and it was like it was made for me or something. Forget every other condiment that came with our food, this is what I dipped my chips in and drizzled over my tacos. Then I spent a lot of time thinking about the cheese dip, which, you know, is kind of okay for a food blogger, but still a tiny bit weird.
I found some of that White Velveeta at the grocery store and I started with that, but then I realized that while American/processed cheese toes all sorts of lines when it comes to being classified as food and sometimes I can be okay with that, it wasn’t okay here. It got all weird and gelatinous and jiggly and I knew I needed to explore other avenues.
After some light stalking of my friend Penny, I discovered that you can buy chunks of Land O’ Lakes American cheese, white or yellow, in the deli department of your grocery store and use it in dips like this. So I sought out some deli white American cheese. I couldn’t find any Land O’ Lakes, but the stuff I did find was infinitely better than the shelf-stable jiggle cube.
To get started, you’re going to need a pound of white American cheese and a 1 1/4 cups of your favorite green salsa (if you’re feeling especially domestic, you could use this or this recipe, but I’ll be honest and say that a) I used the store-bought stuff and b) I kind of preferred it.)
Cut the cheese into 1″ cubes and place them in a medium microwave-safe bowl (or a double boiler).
I realize that Valentine’s Day is in 2 days, and as a blogger I’m supposed to be doing my part to cover the world in homemade cards, DIY wreaths, and a sea of fluffy pink frosting. But I’m making hummus instead. I figure after this week of sweet treats you might want a healthy snack to munch on anyway, so I have your back.
Even though I love hummus, and I love edamame, I always thought the two of them together sounded strange. But that was until Doris. Doris is my favorite sample lady at Costco and she gets me every time with those enticing little paper cups that you’re legally not allowed to touch until they’re placed on the front of the metal cart. After I tried this hummus a while back, my husband and I were hooked. We’ve been going through tubs of that stuff so I figured I’d just make my own. I also wanted to make it a little healthier. For something that’s packed with healthy ingredients, the store-bought version is quite caloric at 80 calories per 2 tablespoons. I eat that much in one bite! Yikes. I’ve put the nutritional info for my recipe at the end of this post, and I’ve cut the calories down by half. Woot!
Happy Friday! I’ve got a quick tutorial today, that we’ve had quite a lot of requests for over the past few years. As if butter isn’t great enough on it’s own, browned butter takes it to a whole new level. Butter is basically emulsified water and fat, with milk protein solids in it. When you melt butter down and let it simmer, the water evaporates and those little milk solids are freed. As they cook in a pan, they turn golden brown and toast, just like any other delicious thing would toast if you put it in a hot pan with some fat. Brown butter tastes like heaven. It can be used in any recipe that uses melted butter, like my favorite Chocolate Chip Cookie Recipe, or this awesome Banana Bread recipe. It’s also amazing spooned over vegetables, or tossed with pasta. It’s pretty easy to make.
You’ll want to start with a light colored pan (like stainless steel.) If you use a dark coated pan you won’t be able to tell when it’s browned and it can go from brown to burned pretty darn quick. Use unsalted butter. You can brown salted butter, but all of the salt gets concentrated in the milk solids and depending on how you’re using it, it can ruin the flavor.
Cut up your butter into chunks and place them in your pan. Turn on the heat to medium and let the butter melt.
After it melts, the butter will foam.
You’ll want to let it bubble away gently, while stirring, and soon the foam will subside and you’ll start to see little brown pieces on the bottom of the pan. Those are the milk solids starting to toast. At this point your house will smell almost like roasted hazelnuts. It’s a really warm, nutty aroma.
Once your butter gets to be a caramel color, remove it from your pan immediately. If you leave it in a hot pan, the residual heat can overcook it.
See all of those little brown bits? Deliciousness.
Some people actually strain those out, but I say no way. That’s where all of the flavor is. Try it drizzled over pancakes or waffles. Okay, or like, asparagus. Whatever.
How to make Brown Butter Tutorial by Our Best Bites
Real butter, unsalted
Cut butter into chunks and place in a light colored pan. Place pan over medium heat and stir butter until melted. Continue to cook, slightly simmering, until butter foams, stirring often. Once butter forms toasty brown bits, becomes a golden caramel color, and has a warm nutty aroma, remove from heat and pour into a separate bowl. Use immediately, or refrigerate for later use.
Guys, we’re SO excited. We got a sneak peak at brand new products going into The Shop soon, soon, soon! Take advantage of our inventory clean-up and we’ll show you the brand new stuff in the next week or two!
So you guys may know that when it comes to plants, I kill them. Not on purpose. But I just cannot keep them alive (I also once accidentally killed a pair of canaries, but that’s another story. Birds and plants are not my thing.)
But I love to grow herbs because I use them so frequently that it’s so much cheaper and more convenient to have a pot of them on my back patio than to buy those tiny little packets. Last summer, I planted some big pots full of herbs. Then winter (an unusually long, cold, snowy winter by Louisiana standards) came and most of my herbs died. The rosemary and basil are kind of poking through, but the dill is long gone.
But the mint…you guys, I’ve found my plant. I cannot kill this.
This happened with literally zero work on my part. I probably couldn’t kill it if I wanted to. We’re a match made in heaven.
It’s funny because you’d think that being a food blogger, I’d make everything from scratch. The truth is that sometimes it’s easy to get into bad habits. The last few months, I kind of burned out on cooking and we have wound up eating out more than we really should have. So during the last couple of weeks, I’ve really been working hard at getting us back into the habit of rarely eating out.
One of the first things I made after my “resolution” was tortellini with mint-basil pesto from the May 2014 issue of Cooking Light (it’s not even available online or in stores yet, so hold tight and I’ll link it soon.) The whole dinner was so delicious–light and fresh and wholesome and feel-good and even my pickypickypicky eater (like the one who makes me not want to cook because things either end in tears or pouting) cleaned his bowl. But the pesto was the star of the show.
Sometimes traditional basil is a little heavy for me, and I’m not a huge fan of pine nuts, but the mint here isn’t super minty, it just brightens up that strong basil flavor. It’s delicious on pasta, pizza, garlic bread, spread on flank steak or pork tenderloin and grilled, anything with a little Mediterranean flair.
You’re going to need fresh mint leaves, fresh basil leaves, toasted almonds, garlic, a green onion, fresh lemon zest and juice, freshly grated Parmesan, and extra-virgin olive oil (I used Our Best Bites Garlic Olive Oil, which is still on sale if you haven’t snagged any yet!)
Chop the almonds
and grate the Parmesan.
Place the herbs, garlic, green onion, almonds, parmesan, lemon, and lemon juice in the small bowl of a food processor or in a small blender jar. Process until the herbs have broken down. With the blender/processor running, add the olive oil in a steady stream until desired consistency is reached.
This makes about a cup of pesto.
Mint-Basil Pesto Recipe Adapted from Cooking Light
Ingredients:
1 cup fresh mint leaves
1 cup fresh basil leaves
2-3 cloves garlic
1 green onion, trimmed
1/4 cup chopped toasted almonds
1/4 cup freshly grated Parmesan cheese
Zest of 1 large lemon
2 tablespoons freshly squeezed lemon juice
5-6 tablespoons olive oil (garlic or lemon olive oil is delicious)
Instructions:
Place the herbs, garlic, green onion, almonds, parmesan, lemon, and lemon juice in the small bowl of a food processor or in a small blender jar. Process until the herbs have broken down. With the blender/processor running, add the olive oil in a steady stream until desired consistency is reached.
Our Garlic Olive Oil is delicious in this (and the lemon would be, too!), so if you haven’t tried them out yet, now’s the perfect time because they’re on sale!
I have always been a lover of barbecue sauce. From the time my mom and I went to Wendy’s for the first time after a rained-out elementary school carnival and I dipped my first chicken nuggets in my first barbecue sauce ever, I have been ensnared by its sweet, sweet spiciness.
As I got older, my tastes matured (well, my taste in barbecue sauce and romantic comedies…in other realms, I’m hopelessly…um…childlike) and I kind of fell in love with mustard-based barbecue sauces. They’re spicy and tangy and bright and the perfect match for the natural sweetness in pork. Or chicken. Or tiny licks from a spoon. Whatever.
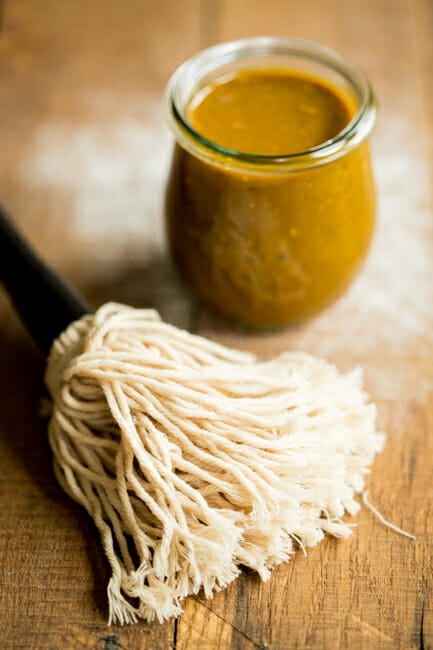
I adapted this South Carolina Mustard Barbecue Sauce from Cook’s Country. Although I totally respect their extensive testing process, I scaled back a little on the hot sauce and the Worcestershire Sauce because I found the flavors overwhelming, but, the beauty in starting out small is that you can always add more if you want (the strength of those flavors will depend a lot on the brands of sauces that you use.) It has become one of our family favorite–it literally comes together in just a few minutes, my husband is a huge sucker for sweet mustardy anything, and it’s delicious mopped onto grilled meats as as a sauce on grilled chicken sandwiches or chicken nuggets.
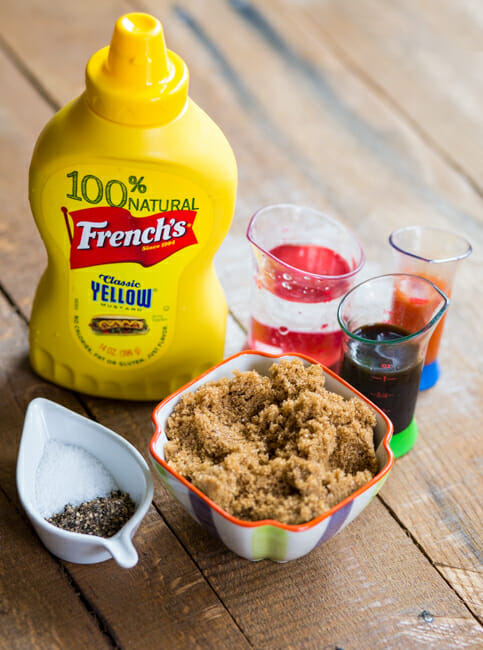
You’re going to need yellow mustard, brown sugar, white vinegar, hot sauce (like Tabasco), Worcestershire sauce, salt, and pepper.
Have weever talked about how brown sugar is one of, like, my top 5 things in the universe?
Ever since I was little, The simple pleasure of patting brown sugar into a cup and then it holding its shape when I dump it out brings me infinite joy. I’m a tiny bit weird.
Now this is fairly tricky. Combine all the ingredients.
Whisk them together. And you’re done. We drizzle this on Kalua Pork or brush it onto ribs or Fauxtisserie Chicken (or rotisserie chicken from the grocery store)–my favorite is to add just a little while it’s still cooking and then serve it on the side (or drizzle it on pulled pork or chicken sandwiches (if I’m planning on using the leftover meat for something else, I’ll reserve some that doesn’t get any sauce.)
South Carolina Mustard BBQ Sauce Recipe adapted from Cook’s Country
Ingredients:
1/2 cup yellow mustard
1/2 cup brown sugar
1/4 cup white vinegar
1 tablespoon Worcestershire sauce (you can add more to taste later)
1 1/2 teaspoons hot sauce (like Tabasco; you can add more to taste later)
1 teaspoon kosher salt
1 teaspoon coarsely ground black pepper
Instructions:
Whisk together ingredients and season to taste with additional Worcestershire and hot sauces. Makes 12 ounces.
Laundry is my favorite chore (if there is such a thing) because while I fold laundry, I can watch TV with absolutely no guilt. This is when I catch up on The Amazing Race and The Next Food Network Star and Teen Mom and 16 and Pregnant (I mean…all those TED talks and Masterpiece Theatre.) Basically anything my husband is not interested in watching with me.
So I was folding laundry and catching up with Karley and Jordan in two particularly depressing episodes of not-Masterpiece-Theatre and an episode of Rachael Ray popped on. I don’t know who the guest was, and I don’t know what the recipe was, but it involved canned white beans and a can of artichoke hearts. And I couldn’t get it out of my brain, so I started playing around and I think it’s safe to say I have a new addiction.
So I don’t know if this is actually hummus. Probably not. I kind of don’t really care–it’s bean-y and garlick-y and healthy and delicious and you can use it like you use hummus. So if it walks like a duck and talks like a duck, right?
You’re going to need 2 cans of white beans (I used Great Northern Beans), a jar of marinated artichoke hearts (I rinsed and drained them, but they still retain plenty of flavor), 4 cloves of garlic, the juice from a lemon, extra-virgin olive oil (garlic, rosemary, or lemon are particularly delicious), and salt and pepper to taste.
Place rinsed beans,
rinsed artichoke hearts, garlic, lemon juice,
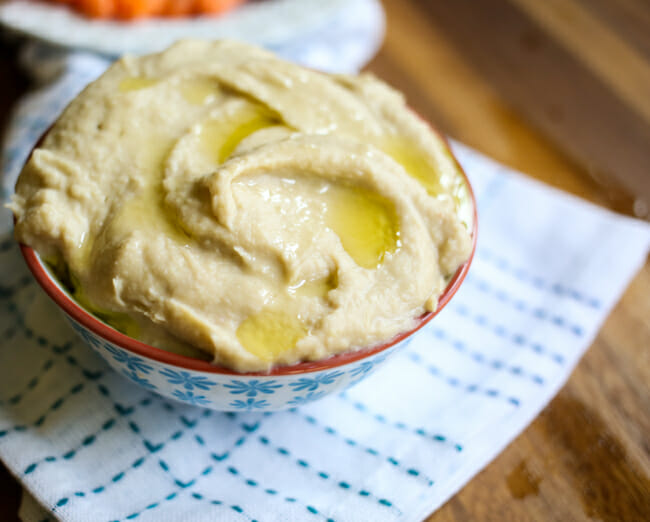
and 2 tablespoons of olive oil in the blender and blend until smooth. P.S.–If you’re interested in winning a Blendtec blender, we’re doing a little Instagram giveaway–click here to see what’s up. Anyway. If necessary, add more oil reach desired consistency. Season to taste with salt and pepper and transfer to a serving dish. Allow to stand for at least 30 minutes. Before serving, drizzle with 1-2 teaspoons of olive oil and garnish with a pinch of coarse salt and freshly cracked pepper.
Serve with fresh veggies, freshly baked bread, pita chips, pretzel chips, as a spread on sandwiches, or on salads.
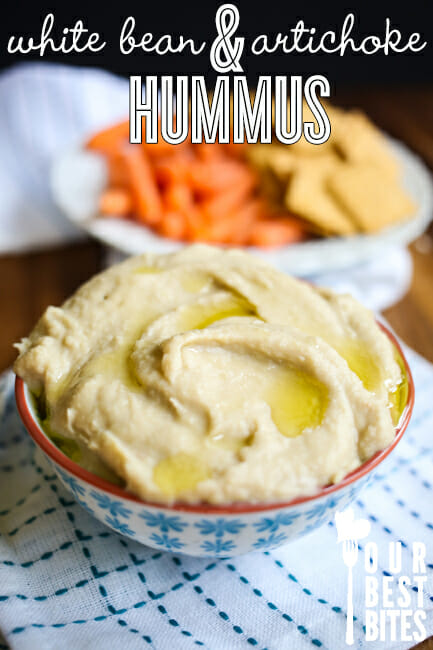
White Bean & Artichoke Hummus Recipe by Our Best Bites
Ingredients:
2 cans Great Northern Beans, drained and rinsed
1 14-ounce jar marinated artichoke hearts, drained and rinsed
4 cloves garlic
Juice of 1 lemon
2+ tablespoons extra-virgin olive oil (garlic, rosemary, or lemon are particularly delicious)
Kosher salt and freshly ground black pepper to taste
Instructions:
Place rinsed beans, rinsed artichoke hearts, garlic, lemon juice, and 2 tablespoons of olive oil in the blender and blend until smooth. If necessary, add more oil to reach desired consistency. Season to taste with salt and pepper and transfer to a serving dish. Allow to stand for at least 30 minutes. Before serving, drizzle with 1-2 teaspoons of olive oil and garnish with a pinch of coarse salt and freshly cracked pepper. Serve with fresh veggies, freshly baked bread, pita chips, pretzel chips, as a spread on sandwiches, or on salads.
 Two weeks ago, I decided I needed to practice our Better Homes and Gardens cook-off recipe one more time before the big day, so we did a test run of burgers and s’mores (which were not part of the cook-off, but it was the first time in 6 months we could light a fire without immediately wanting to die). My friend Jeni brought fries and with them, she brought what was hands-down one of the best dipping sauces I’ve ever had. Ever. Like…one of those dips where you check to see if anyone’s looking and then nonchalantly dip your finger in it and then proceed to lick it off. Yes, I totally just admitted to that.


 One of the reasons I used to be scared of
  Also, Worcestershire sauce, red pepper flakes, dry mustard, salt, honey, and apple cider vinegar.
 The recipe calls for “finely chopped” everything. I figured everything would break down after simmering, but it didn’t break down as much as I thought, so definitely chop things up small unless you want a really chunky sauce.

 One of the main reasons I knew I would like this: honey. Mmm…
 In goes the apple cider vinegar, red pepper flakes (this does have a nice little kick to it; not too spicy, but enough to notice) ground mustard and Worcestershire sauce.
 You just need to bring it to a simmer and let it work for about 30 minutes. Everything will break down and you can gently smash things up with the back of a spoon if you need to. I even stuck a potato masher in there at the end to get the consistency I wanted.
 You can see in the photos how it goes from looking like a salsa to a darker colored, thicker sauce.
 You should also heat up a small pot of water with your lids in it while your sauce is simmering. Bring it to a simmer and leave lids in the pot until you’re ready to use them. After your jars are filled up with your sauce, wipe the rim to ensure it’s clean and dry. Use the magnet tool (
 After they come out the jars need to sit at room temp. Don’t be tempted to fool around with them, just leave them alone! I had enough sauce to can 3 full jars with a little left over. My family really loved it- we thought it pretty good as it was going into jars, but it was way better after it had cooled and thickened a bit and the flavors had a chance to marry a bit more. And while it was really great on a spoon, it was fantastic with grilled chicken.
 With honey and cider vinegar being main flavor components, I instantly thought of our beloved
  You can see in the pictures it’s almost like a thick salsa. It’s sweet and tangy and savory and so great when combined with the meat. Hope you guys enjoy it as much as we did; this is something that would make a great gift!


 When it comes to holiday goodie-giving, you’ve got the go-to regulars, like


 Once you blend that up, set it aside while you melt your chocolate. Place a metal or glass bowl over a pot of simmering water to gently melt the chocolate. If you’re careful, you could melt it in a glass bowl in the microwave as well.